
Wednesday, 18 July 2012
Strictly Party
Sunday, 15 July 2012
Sunny happy days

The sun has made a couple of fleeting visits today which has been lovely.
This is another samples from the present loop. Happy days are here again. I just love cutting up those papers and using them as embellishments.
Friday, 13 July 2012
Dutch fold
Love theses Dutch fold cards this one has been teamed up with strictly party. The card base is textured card stock a really bright colour for another dull summers day.
On a brighter note am off to see the torch parade. Hubby has been marshalling it for the past 2 days and says the atmosphere is amazing this from the grumpy old git is an amazing statement in it's self.
See you tomorrow at the range Bournemouth.
On a brighter note am off to see the torch parade. Hubby has been marshalling it for the past 2 days and says the atmosphere is amazing this from the grumpy old git is an amazing statement in it's self.
See you tomorrow at the range Bournemouth.
Wednesday, 11 July 2012
Strictly Christmas
Another blood test so more sitting around. So another chance to post a card. This one is strictly Christmas meets Chelsea green saw this idea on Jo Austin's blog so this is my variation of it. Love those designer die cuts for creating a nice edge to your project. My top tip would be to draw round them and keep as a template. Before I built up the decoupage I cut the base layer with my die. I then drew around the die onto mirror card. There is a bit of ruffle on the spin side.
See you tomorrow. Where will I be????
See you tomorrow. Where will I be????
Tuesday, 10 July 2012
Happy days are here again!!!
Sat waiting for the supermarket to open so thought why not blog a card. So I hope the card I have picked matches the description. This should be a happy days card using the cans paper which I chopped up, shaped and layered. I did the same with the advert!! Again I distressed the edges and layered with the embossed stitch folder.

Monday, 9 July 2012
Strictly party

A simple little offering today using the Strictly party ultimate die cut pack. This is one of the toppers layered with mirror card and papers from the same pack. I used 3d gloss on the butterfly and a portabello rd bow. The little blue dots are from a goody bag last year so you may have them if now a couple of gems would work.
Sunday, 8 July 2012
Christmas is here

The sun is shining here today I hope it's dry where you are as I'm sure we are all now getting fed up of this rain.
This is one of the Christmas cards from yesterday I used the Christmas tidings ultimate die cut pack. These are such good value. I use a topper that had a frame. I cut the frame off and matted the picture on to silver mirror card which I then stuck to the paper covered card. The frame is then mounted onto the card with foam pads at a jaunty angle. Finished off with a sentiment and some layered poinsettias from the goody bag.
Saturday, 7 July 2012
Oh happy days

Oh happy days!!! raining all day never had to drive with my wipers on full pelt with vision of about 20mtrs. The demo in Gosport range was dead. I'm beginning to worry now thats 2 on the trott. Still Bournemouth Range next week should be busy!!!
Thought I would put up a card I made today for you to have a peep at, this is a 13.5cm square card using happy day products. Lots of layers to give dimension and black inked edges and distressing. Really must have a play at scrapbooking with this range.
Friday, 6 July 2012
Tea bag folded card


Take 4 of each design to create the rosette. Alternate the tiles and using a little Anita’s tacky glue on the top of the lower fold slide the next piece in to place repeat with all 8 tiles. The centre generally leaves a small hole so use a blitter to conceal this. Using your tacky glue stile the rossete to the card. Stick the spare tile onto the bottom right hand corner of the base. Finish off with a few gems.
Monday, 2 July 2012
Lucy meets Wellington


Sunday, 1 July 2012
Distressed wellington
A bit late today but here's my offering an easel with more from the die cut decoupage pack this time I distressed the papers and image.
I have received my new kit so this week I will be making samples for my demos gosport range 7th July and Bournemouth range 14th July pop along and see what I've been up to.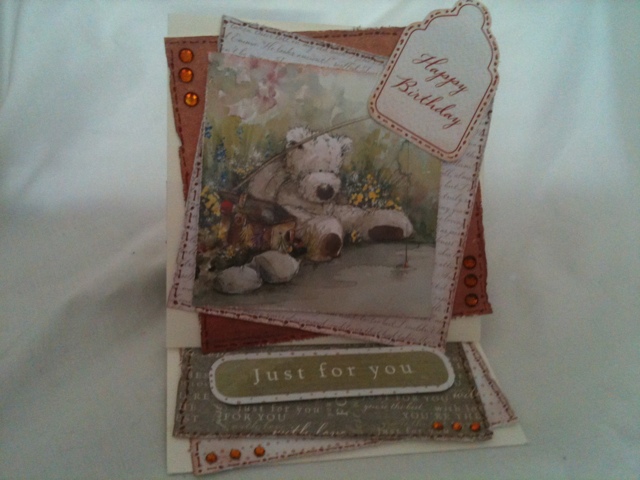
I have received my new kit so this week I will be making samples for my demos gosport range 7th July and Bournemouth range 14th July pop along and see what I've been up to.
Subscribe to:
Posts (Atom)